Well than I mostly said - said more directly menjuju good tutorial to make Aquamarine effect with Photoshop. results designs Well like the picture below for example Effect Aquamarine.
Details tutorials
Level of difficulty: Beginner
Software used: Adobe Photoshop CS3, can use other versions
The material being studied: Playing Image Adjustments menu, mode and duplicate layer opacity
Older manufacture: 5 Minutes
Photoshop tutorial
Step 1: Open the Photoshop program
As usual. You must first open your favorite software Adobe Photoshop CS is up to version number only and is not a problem, either new, namely Adobe Photoshop CC and old such as Adobe Photoshop CS.
Step 1: Open the Photoshop program
As usual. You must first open your favorite software Adobe Photoshop CS is up to version number only and is not a problem, either new, namely Adobe Photoshop CC and old such as Adobe Photoshop CS.
Step 2: Open File
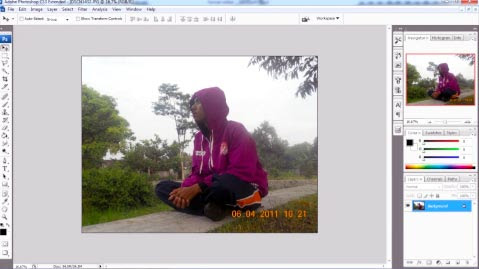
Open the image by using the menu above to select the files - can open or press CTRL + O by using the keyboard, select the image you want to edit the new window that appears, may be photos of you and your girlfriend too, unless your former photo * Wahaha. Then tap open until the display appears as shown above. Step 3: Duplicate Layer
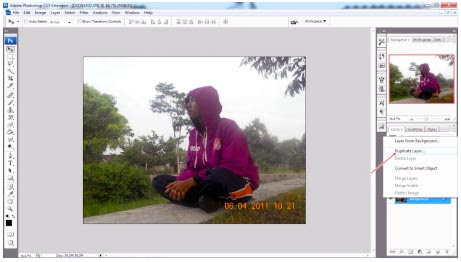
Then duplicate your photo layer which has been opened before. How to right click the layer and select duplicate layer. Or you can also press CTRL + J on the keyboard and you can see directly layernya now be two.
Step 4: Playing with adjustment
Well in step four we start playing the image menu adjustments, OK it's time to play around diadjustments which is in the Image menu.
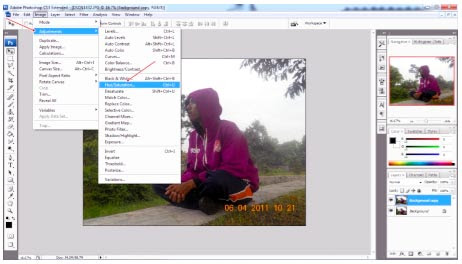
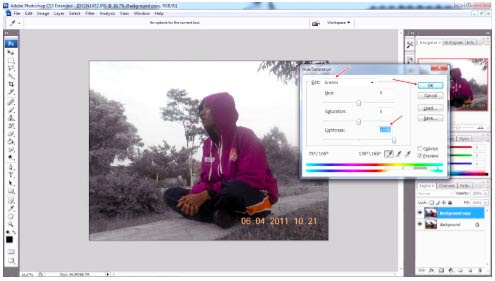
Click the image - adjustments - Hue / Saturation or straight to the point you can press CTRL + U. Then adjust the colors in the window that appears, by pressing Ctrl + 2 to edit it turns into yellow mode, and set the Lightness to +100. then repeats these steps as shown below Photoshop Learning Guide.
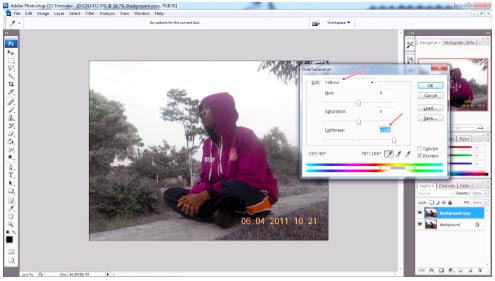 .
.
Langakah 5: Playing with Adjustment Still playing around in the menu Image - Adjustments .. but the difference lo yes, in step five, I will berlaih Curves settings .. Upsss as the previous step do not forget to Duplicate the layer again
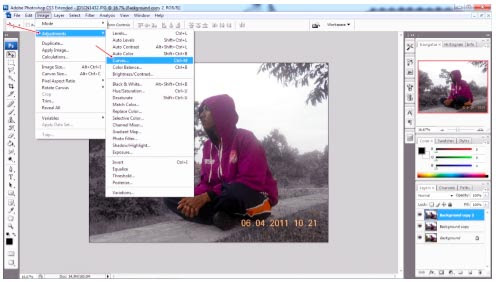
If it click the menu Image - Adjustments - Curves .. then immediately wrote to change presets in the window that appears and at the top is "None" becomes Ligther (RGB)
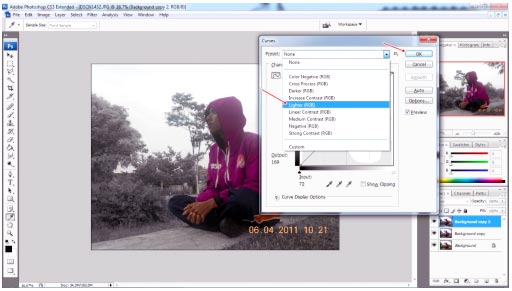
ReplyDeleteIf you want more design Please Click Hear